MetaMask Guide
MetaMask - The essential decentralized wallet
By Crypto Nation – 12 January 2021
With its ease of use, its integrations, and its compatibility with most internet browsers, MetaMask is the cryptocurrency wallet that you absolutely must have! This allows you to make the link between your browser and the Ethereum blockchain (and even others), by storing the ERC20 tokens natively.
MetaMask: Simple and extremely efficient
Contents of our guide on MetaMask :
What is MetaMask?
MetaMask is a cryptocurrency wallet in the form of an extension for a web browser. It allows you to easily manage all the tokens of the Ethereum blockchain, but also those compatible with the Binance Smart Chain and others!
But MetaMask doesn’t just stop at allowing the storage of your cryptos, it’s also a blockchain browser, allowing you to interact with decentralized applications directly from your internet browser.
In addition, you hold your private key here, which considerably increases the security of your cryptocurrencies.
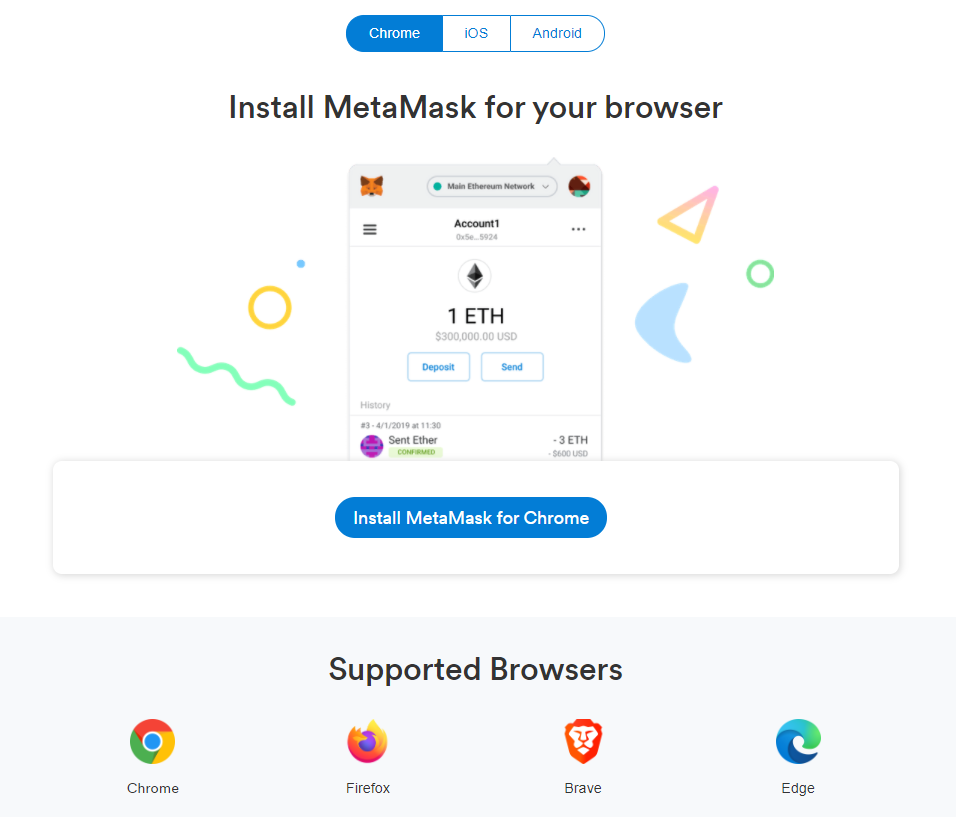
MetaMask installation
First you have to go to the official MetaMask website by clicking here, then start the installation. Confirm that you want to install the extension.
Now that the installation is done, you need to create an account.
You will see a new small icon, in the form of a fox’s head (![]() ), at the top left of your internet browser. Click on it to open MetaMask.
), at the top left of your internet browser. Click on it to open MetaMask.
You will be offered to create a portfolio.
Enter a strong password! This allows you to encrypt your private keys, which are stored locally by MetaMask in your internet browser.
Finally, safely save your 12-word recovery phrase. It will allow you to regain access to your funds if you lose or change your device. This sentence therefore gives full access to your funds placed in MetaMask, be sure to keep it secret!
To finalize your new account, you will need to confirm your recovery phrase to verify that you have saved it.
You now have your MetaMask wallet, ready to use!
How to use MetaMask
Open MetaMask by clicking on the fox head icon (![]() ). You can enlarge this view by going to the right menu (ellipsis) and then clicking on Enlarge view (or Expand View).
). You can enlarge this view by going to the right menu (ellipsis) and then clicking on Enlarge view (or Expand View).
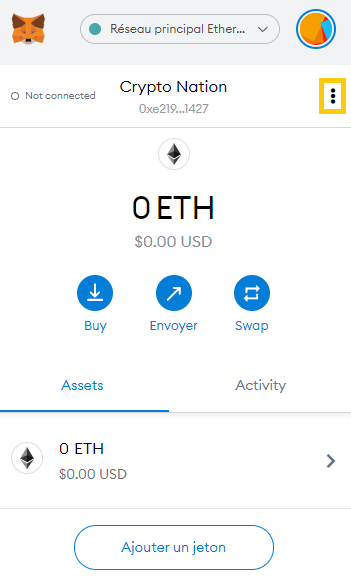
At the top of the interface, you can access a drop-down list to choose the network, if for example you want to go through the Binance Smart Chain. In the vast majority of cases, you will be using the Ethereum mainnet.
Otherwise, below this list is the name of your wallet and its address. You just have to click on it to copy it, and to be able to make deposits through it, in order to fill your new wallet.
In the main box, you will see the amount of Ethereum (ETH) you have in this wallet. You then have three possible actions:
- Buy: to buy Ethereum directly through MetaMask and Wyre by credit card, or deposit Ethereum from another source if you already have it.
- Send: to get the cryptocurrency out of your wallet to another address, or to transfer between your MetaMask wallets.
- Swap: to exchange a token that you have in your wallet for another cryptocurrency. However, we recommend that you do it instead via platforms like Uniswap or 1inch.
Fees
When you send or exchange cryptocurrency, you will have to pay a fee for using the network. They are generally referred to as gas, and vary constantly, depending on current grid usage. The more people who want to use Ethereum at the same time, the more the price of gas increases. If the fees are too high for you, try again later hoping the blockchain is quieter.
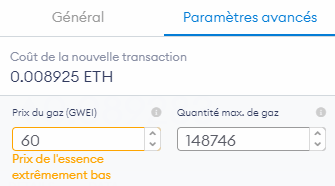
Also, the higher the cost of fees you choose, the faster the transaction will be. Be careful not to specify a custom gas setting that is too low, otherwise your transaction may fail.
On the Ethereum network, therefore, avoid low value transactions, otherwise the fees may be higher than the total amount of your assets!
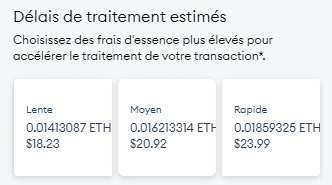
Yes, on our pictures, the fees are very high, due to a saturation of the Ethereum blockchain at the time of writing this guide. But rest assured, the price of gas is generally much cheaper.
In the two lower tabs , you will find, in the first one called Assets, the list of the different cryptocurrencies that you have on this wallet, in the second, Activity, the history of your transactions and your interactions with various applications.
Add tokens to your wallet
All other ERC20 tokens, for example, are kept at the same Ethereum address that is used to manage your ethers. Any of these ERC20 tokens will therefore be deposited on a unique and global address to your MetaMask wallet.
It happens for some tokens, that MetaMask does not automatically add it to your list in the wallet. No worries, just do it manually. To do this, go to MetaMask, Assets tab, and click on Add a token at the bottom.
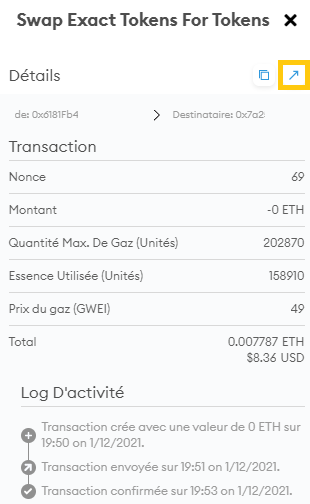
Search for your cryptocurrency, if it is present in the list, you just need to click on it and add it. If it is not present in the list, go to the Custom Token tab. You will need to enter the address of the token contract. Where to find this information? You need the hash of the transaction in question (and enter it in etherscan.io). For example on MetaMask, this information can be found in the Activity tab, then by clicking on the transaction. The arrow then directs us to etherscan.io.
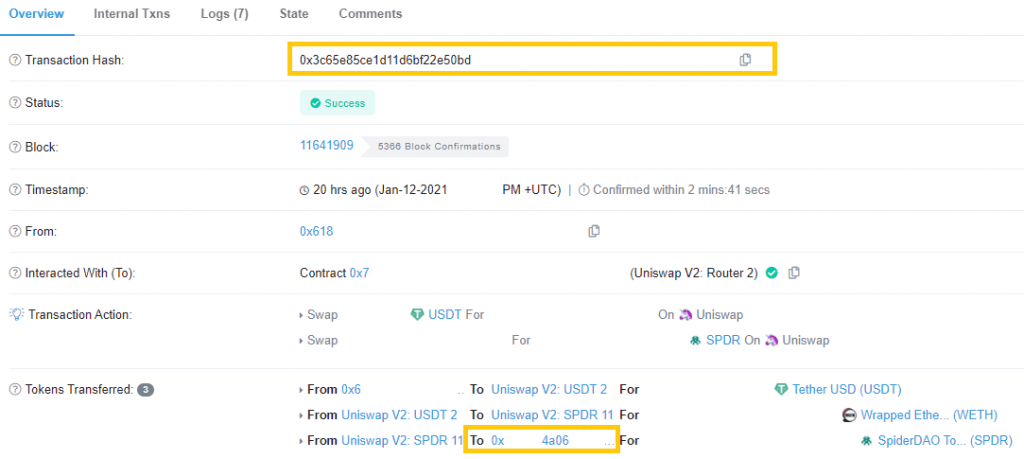
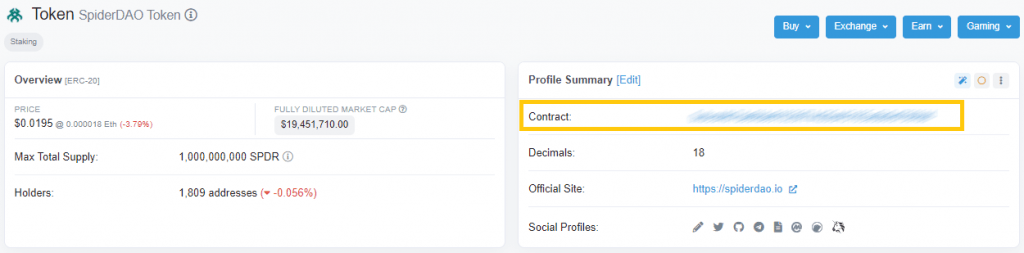
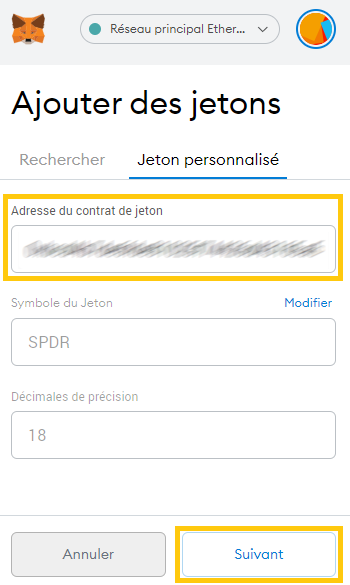
You must then click on the end of the transaction address (framed in the image). We arrive on the final page, here that of the SpiderDAO token, where we obtain the Contract address (framed in the image). You just have to copy it, and paste it in the previous field on MetaMask, named Address of the token contract. Click Next, then Add Tokens. Your tokens are now visible in your MetaMask wallet.
Add compatible blockchains on MetaMask
With MetaMask, you will be able to interact with the Ethereum blockchain in the first place. However, many other networks can be used through this wallet! We will see here how to configure them in order to be able to use them.
Whatever mainnet you want to add, you will need to start by clicking in the selector at the top of the MetaMask interface and selecting “Custom RPC“.
This will open a new window, in which you will have to enter the information corresponding to the network you want to configure.


Binance Smart Chain (BSC)
- Network Name: Binance Smart Chain
- New RPC URL: https://bsc-dataseed.binance.org/
- Chain ID: 56
- Currency Symbol: BNB
- Block Explorer URL: https://bscscan.com
Polygon (MATIC)
- Network Name: Polygon
- New RPC URL: https://polygon-rpc.com
- Chain ID: 137
- Currency Symbol: MATIC
- Block Explorer URL: https://polygonscan.com
Avalanche (AVAX)
- Network Name: Avalanche Network
- New RPC URL: https://api.avax.network/ext/bc/C/rpc
- Chain ID: 43114
- Currency Symbol: AVAX
- Block Explorer URL: https://cchain.explorer.avax.network/
xDAI

- Network Name: xDai
- New RPC URL: https://rpc.xdaichain.com/
- Chain ID: 0x64 (ou 100)
- Currency Symbol: xDai
- Block Explorer URL: https://blockscout.com/xdai/mainnet/
Arbitrum
- Network Name: Arbitrum One
- New RPC URL: https://arb1.arbitrum.io/rpc
- Chain ID: 42161
- Currency Symbol: AETH
- Block Explorer URL: https://arbiscan.io